Starting a WordPress Blog on a Low Budget in 2025
If you also want to start your blog website on WordPress in 2025, then you do not have a budget. First of all, creating a website on WordPress is very costly, so today I will tell you how you can create your own website in WordPress without any high budget. Today I am going to share a method with you based on my experience, which is the best for beginners.
- Table of Contents
- Why Hosting is Essential
- Recommended Hosting: Hostinger
- Setting Up Your Website
- Installing WordPress on Hostinger
- Accessing Your WordPress Dashboard
- Introducing Revision Pro Theme
- What is Revision Pro WordPress Theme?
- How I Discovered Revision Pro
- Installing the Revision Pro Theme
- Customizing Your Theme
- Why Revision Pro is Good for Blogs
- Where to Download Revision Pro
- Free vs. Paid Version of Revision Pro
- How to Install the Paid Version
- Importing Demo Content
- Cool Features of Revision Pro
- Tips for Using Revision Pro
- Common Problems & Solutions
- Why I Love Revision Pro
- Revision Pro vs. Other Themes
- How to Earn Money from Blogs
- Affiliate Marketing with Revision Pro
- Speed & UX Optimization
- FAQs About Revision Pro
- Final Thoughts
- Support & Questions
Why Hosting is Essential
Because look, if you want to start your own blog, it is necessary for you to buy hosting. Buying hosting is a must because when you want to make your website online, hosting is the first thing that is necessary. After that, you need a domain, which you get when you get hosting.
Recommended Hosting: Hostinger
So for hosting, I will recommend you to go with Hostinger because if you buy hosting on Hostinger, you will get 50 websites, which is one. You can host on hosting and you get a domain for free. Along with that, the SSL certificate is also completely free. For all domains, you do not have to pay any separate charges for this.
Setting Up Your Website
Now let’s talk about how you have to set up your website. The first important thing to do to create a website is hosting, which we have taken. Now we have to install our WordPress.
Installing WordPress on Hostinger
If you take Hostinger’s hosting to install WordPress, then there you will get the option of auto-installer in your dashboard. When you click on auto-installer, a dashboard will open in front of you where you have to give the login details of your website and after selecting the latest PHP version, click on install. As soon as you click on install, WordPress will be installed on your hosting.
Accessing Your WordPress Dashboard
Simply install your WordPress. Simply go to your website. And the URL of your website is example.com slash wpadmin. You have to type in the URL and enter it. As soon as you enter it, the WordPress login panel will appear in front of you. On it, you have to add whatever login details you have given while installing WordPress on SamHostinger. After adding the email and password, you have to click on this login. Then your WordPress dashboard will be logged in. After that, I will share with you everything you have to do in simple and easy steps.
Introducing Revision Pro Theme
So, welcome sir. I have to tell you about an amazing feature, which is Revision Pro Theme. It is perfect for WordPress blocks. I tried it on my blog and it was very easy. I am not an expert in technology, but still I was able to make my blog look good because this theme or feature that I am going to tell you about loads fast. And it also gives good rankings on Google. I will share everything I have learned about it because I think you will also like it.
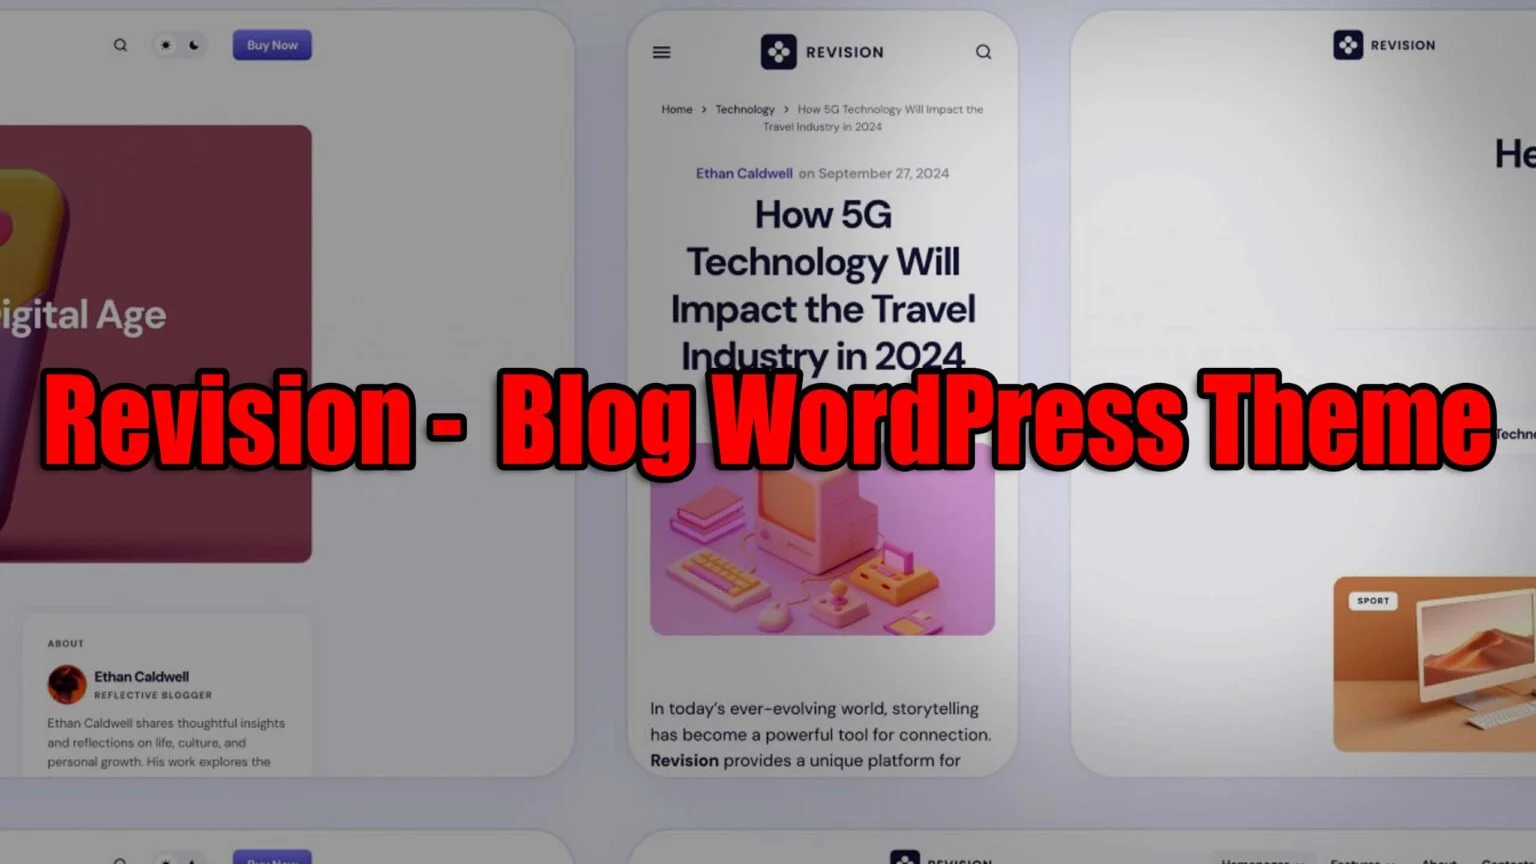
What is Revision Pro WordPress Theme?
What is Revision Poro Poro WordPress Theme? Division Pro is a unique theme specially made for blogs. I discovered it when I was starting my first blog. It is made for WordPress, which helps you create a website without any technological knowledge. You don’t need to hire any developer or pay him thousands of dollars. This theme is for those who want to share their expenses, thoughts or whatever they like. I found this theme very beautiful the first time I saw it. The colors were good and everything was easy to find. I was happy to use it.
How I Discovered Revision Pro
When I was starting to learn WordPress, it was very difficult for me to find a good theme that would give my blog a premium look and would also be responsive and SEO friendly. So, with great difficulty, I found this theme. I saw a YouTuber using this theme. So, I copied the URL of his website and then there was a website called WP Theme Detector.com. I went there and pasted the URL of his website. From there, I found out that this creator is using the Revision Pro WordPress theme. So, I simply searched on Google and found the free version of it. So, I installed the same free version on my WordPress.
Installing the Revision Pro Theme
So, how did I install it? Let me tell you. To install it, you simply have to go to your dashboard, which I have already told you how to open the dashboard. So, simply. You will get an option in the sidebar for Appearance. When you click on Appearance, you will get the option for Themes. There you have to go to the Themes section. Here, you will see the theme that is already installed. Simply go up. You will get the option for Upload Theme.
Then you will get the option for Add Theme. There you have to go to Add Theme and Upload Theme. You have to select the revision version that you have downloaded. You have to install it. When you upload it, the option for Install will come. Then you have to install it. After installing, you have to purge the cache. After purging the cache, you have to open your website. As soon as you open your website, you will know how your website is showing with the new theme.
Customizing Your Theme
After that, we have to customize our theme. To customize it, if you are on the first website, If you have customized, then you will know how to do it, but I am making this tutorial. If you are a beginner, then how to do it as a beginner. Now let’s talk about it. If you are a beginner, then you have to open your home page. You will see a strip on the top of WordPress. There, as soon as we come to the dashboard, in the theme, you will see the customizer option.
Below the theme, you will find the customizer option. If you click on it, then all the customization data will be shown to you. From there, you have to customize your website and your accounting. As I am telling you, maybe you do not understand something. So, I have specially made a video for this. You have to watch that video. Step by step customization, installation, everything.
Why Revision Pro is Good for Blogs
Now let’s talk about its blog. Is it good? What is good about it? Now let’s talk about these things. For Revision Pro Block. Let’s talk about why it is good. It has perfect spacing for photos. The biggest feature is that it shows the block post’s background. There is an option to show it. The comments system is good. The loading speed is very fast. Low wait. People don’t wait. Which is very good for mobile. According to SO, Google also likes this thing. It is mobile friendly. Nowadays, everyone reads from their phone, so it becomes very important for them.
Where to Download Revision Pro
Now let’s talk about how to download Revision Pro. I finally bought Revision Pro and was very happy. Here are the steps from where to download it. You can download its free version from the WordPress theme store. You can also get its premium version from the official website of Revision Pro. You will get to see its version on a trusted platform like Theme First. I once accidentally took a theme from an unsafe website and I got blocked. My website got hacked when I was new to learning WordPress in 2021. I used to think that this pad, which is a big website like Theme First, which provides such expensive themes, in comparison to the 10 dollar theme it is giving me for five dollars, I didn’t get it. I thought, man, it doesn’t matter, man, I will download it from it, what happens, I will save a little. I made a mistake and downloaded it from the website. It was a GPL version or a nerd version, with the help of which my website ran fine for a few days. Apart from that, the loading speed started loading slowly, just like it was loading on the website. One day, my website crashed, which I will never recommend to you. Brother, you should use the GPL version or the nerd version from any of these websites. Therefore, I recommend you not to take the GPL version of Reason Pro or download it because your website can be hacked. Now let’s talk. Where can you get this version? As I told you before, you can find it on ThemeForest or on the Revision Pro official website.
Free vs. Paid Version of Revision Pro
Now let’s talk about the free version of Revision Pro vs. the paid version. Let’s talk about the features. The basic design is available in the free version and in the paid version. After that, the color choice is a little less in the free version, and in the paid version, you get to see all the options. Now let’s talk about the support that is available, it is limited, and in the paid version, you get full support. Now let’s talk about specific blocks. In the free version, you don’t get blocks, and in the paid version, you get blocks. The updates that are available are sometimes available. In the free version, you always get updates. I first tried the free version, then saved money and took the paid version. It was my best decision. You also have to do the same. As my blog got ranked, I earned from AdSense. I spent the same amount on my website by writing its paid version because I was satisfied with it.
How to Install the Paid Version
Now let’s talk about how to install it, okay, as I told you earlier, you have to go to Aperture and install it from there and install the theme. If you are going to buy the paid version, then simply get the free version. Similarly, you have to upload the paid version as well.
Importing Demo Content
Now let’s talk about its demo. Okay, because these are such themes, in which you get demo content, so you don’t need to do anything yourself. The demo content is uploaded, the category menu is created, so what is the benefit of it? You have to reset your website, replace the same categories in your categories, and you have to replace the block content with your content, so it is easy for you. If you are a beginner, then this is the best option for you. So how to import the demo, you have to go to the settings of Revision Pro. You will get an option to import a demo. Okay, this is optional. You will get another option somewhere. If you want to watch the video, I have discussed everything in it. You have to click on it. You have to wait for a while because it takes a little time. All the sample accordions will be imported automatically. After importing, you will get an option that the import has been completed. Visit your website. Here, I want to give you a tip. First, import the demo. Then make changes gradually. There will be no confusion. If you want to customize your website, first install the demo. Only after that, you have to start changing your website. This is going to be the best tip for you.
Cool Features of Revision Pro
Now let’s talk about the cool features of Revision Pro. The same goes for the features. You can customize colors, fonts, and layout. And it is responsive, it is optimized, which Google likes very much in ranking. I have noticed this myself. After this theme, my articles were not indexed or ranked in Google that much. When I used this theme, I used Revision Pro, so my website was added to Google and started getting ranked. This theme depends on the case, but more than that, it depends on the content of the top, which depends on the content and topic. It simply does not depend on the entire theme. The content also has value. I have kept seasonal colors, and in the term, orange, brown, spring, green, yellow, it is fun. Brother, this feeling is different. How did I customize my blog? Colors: font, blue, purple. I told you, I made the letters a little bigger, changed the logo and favicon, and then updated the menu, which is in the widget.
Tips for Using Revision Pro
Here is a tip for using Revision Pro: First, use the demo content. First, you have to input the demo. After installing it, you have to select your main color. Okay, this will be the second tip. In addition to this, the third tip is to add a clear, high-quality image. Okay, it’s clear. Okay, it’s not too messy. Above that, you have to add images. In addition, create an About Me page where you can tell me what I do on my website. What I have to do? What do I have to upload? Who is your target audience? Okay, why am I starting this from the web? Tell me all this. People make mistakes. They don’t do all this. This is the biggest help for Google to understand what your website is about. Who is it for? For which audience is it for? Now, it becomes easy for Google to rank you. Now, the fifth tip is to check the mobile view. Okay, check your website again and again. After 10 to 15 days or after a month, you must check how your website looks on mobile. If there is any error or technical issue, then solve it. If your website is not mobile friendly, then your website will not rank. You must take care of this.
Common Problems & Solutions
Now let’s talk about the problems. Okay, it’s a common problem. Let’s talk about the common problems and solutions of Revision Pro. First, if the menu is not showing.
So simply go to your dashboard, go to the Appearance slash menu, here you will come here, here you have to click on the menus that you have created earlier, which are imported in the demo, select a menu, I have to select it, from there you get the options below, you are right, from there you have to fix the header menu, footer menu, select or create it, you have to add it, now if you want to add it to the header, click on the header, add it to the footer, you have to do it on the footer, then you can solve this thing in this way, apart from that, the images are very large, so you can already compress the images to PNG, you get online tools, now the third problem that occurs is that the text is difficult to read, so the solution for this is that you have to change the font that you have and I have to make the size of the font a little bigger. Okay, I have a problem. How do I change the font? Simply go to Customize. After Customize, the Customize screen will be displayed in front of the Customize screen. There, you will get an option on the left side. Go to Typography and you can check the font by making it smaller or larger according to your own calculation. In my experience, all problems are solved. Don’t worry, you are right. Just understand a little.
Why I Love Revision Pro
Why did I like that revision? Okay, because it is easy to use. No coding is required. If you are a beginner and want to start, it is best for you. That’s why I like it the most. After that, the biggest thing is that Google likes fast loading. The faster your website is, the more racks it has because the users who are there get content directly to you and it is in seconds. I don’t have to wait. I tested it on GT Matrix. It gave a very good score. You can also test it for your fast loading. It is perfect for ads. It is also the best for Google Adsense. Okay, if you are not getting Google address approval, then themes. If you are having issues, then you can use this theme. If you want to earn money from Google Adsense, then you will have to get this theme. Okay, if you like something else, obviously you can do it. I am sharing my experience. There is no 100 percent guarantee. Okay, you will use the theme now by taking money. No, it does not depend on your content. But it was very good for ads.
Revision Pro vs. Other Themes
Now let’s talk about Revision Pro vs. Other themes. Different themes like GeneratePress is medium easy for all websites, but Revision Pro is better for blocks. Now let’s talk about Astra. There are many options but it is also confusing. It can be a little confusing, I think in Straw, but there you have to do everything yourself. Here, by importing the demo, we can easily and easily create our own content in Rez Pro.
How to Earn Money from Blogs
Now let’s talk about how to earn money from blocks. The first thing is that if you want to earn money, then the biggest option is Google Adsense. You have to provide good value to the user by using a responsive theme. After you have done this to the user, after writing 20 to 25 articles, after writing valuable articles, after creating all the important pages, after creating your menu, after you have to apply for Google Adsense, then Revision Pro is a theme that is good for ad space, which easily creates chances for you to get your Adsense approved.
Affiliate Marketing with Revision Pro
Now the second way to earn money from blocks is affiliate marketing. Here, you can recommend the products and earn commission on them, like mine. This website is related to website designing, so I can affiliate hosting, okay, if anyone buys from my link, I will get a commission for it, which is also necessary for building a website, just like I told about Hostinger above, okay, I can add my link there, okay, this is my affiliate link, go to it and you can buy from here, but the important tip is to always tell the user that this is my affiliate link, you have to tell the user that if you buy it now, I will get a commission, you have to tell it specifically, okay, so if you don’t tell and add the link, it can be difficult for you to get Google Adsense approval.
Speed & UX Optimization
Now the third thing is that it measures speed and UX, Revision Pro helps with that, okay, this thing has become very good for you, now the tip that I want to give is to recommend only those products that you really like, okay, not that Well, if you do 28 and more like this, you will not be credible, just like if people trust me, then I also have the right to provide real information to the user. It is not like that, if I recommend any girl thing in the pursuit of my greed or my commission, they will not buy from my link again. They will say, “Man, this guy is fake.” So you have to take care of this important thing.
FAQs About Revision Pro
FAQs about Revision Pro Is it good for beginners? Yes, it is good for beginners because I was a beginner myself when I used this theme. Is there a free version? Yes, it has a free version. You can easily download it. You just have to go to Google. Okay, if it is free, you will not go to its free version or use its nut version. Your website can be hacked. Is it good for SEO? The answer is yes. Fast loading plus clean code. Google likes it. That is why I have already told you about the best theme above.
Final Thoughts
Now let’s talk about the final word. I love Revision Pro very much. Why am I saying this? Because, I found this best theme because when I started my blog, I could not share it with my domain. But it was fun. Okay, I was very happy when I found it. Before that, I kept searching a lot that I wanted to create a blog. Beginner’s room. Okay, so it helped me a lot. Help, what can I tell you, I am so happy, now I have started my own blog to write an article, so I told you that I was telling you on the same topic, how even a beginner can install a website on WordPress, so I have recommended this theme to you based on my personal experience, okay, because I liked this theme myself, so I am sharing it with you, okay, it is beginner-friendly, you can easily create your own blog, so in my opinion, this is the perfect choice, start with Reason for free, then you can upgrade, when you start earning from it, my blog looked full professional, I enjoyed it, okay, so that was our topic today, how if you are a beginner, you can create your own website, without any coding knowledge, without hiring a high-tech businessman, without paying so many dollars, how can you create your own website for free?
Support & Questions
If you like my content and want to support me, you can also check out the other topics. Also, if you have any questions or want to ask something, you can ask in the comment box. I will definitely answer you.